3D Modeling Evaluation
SpaceCraft
I modelled my spacecraft basing it off the style of some of the ships from Star Wars. I made the body of the ship in the style of the X-Wing and expanding the body length ways and added on the glass component and a leather chair to bring the model more up to date. The construction panels that connect to the wings were made intentionally in an industrial style and if it was a real spacecraft it would be more areodynamic as the wind could travel through the spaces in them, giving them more of a lift whilst flying. I also applied glowing lights on the ship to added thrusters to make the ship look futuristic.
I added a Robot that sits in the front of the ship, this robot would help the pilot navigate to their destination. The robot was based off the medical droid R2-D2 from the Star Wars series.
Many ideas of the ship had come into my mind, but creating a futuristic ship with higher class seating made it seem more realistic and more comfortable for the pilot.
Environment
My environment includes a secret government location that is set in a deserted wasteland several miles from any civilisation. It also includes a skydome and a spacedome. From the inside of the spacedome you are able to see Space and the planets. I aslo light up the spacedome with an Omni light which represents to light from the stars in Space.
I added a plane which I then turned into sand using a texture and turning the plane into an editable patch.
Animation
I had several ideas for my animation, these includes free-running, a giant picking a person up and throwing him around, somebody walking down a flight of stairs and a fight between two people. My final outcome was two people having a force fight throwing objects at each other. This came from the Star Wars inspiration that I used to create my environment. In my actual game I would have created objects such as boulders, bricks and other dangerous objects to make the animation seem realistic.
The Plan
The plan was to create a game that consisted of a third person shooter from the perspective of a ship in space. The plan was also to create a futuristic deserted planet where everything had become scarce, this is where my idea to create the government location in the wasteland as it showed the emptiness of the planet.
Conclusion
In conclusion I think that if I was to do this again and properly I would create a 3D model of the pilot for the ship and animate him so that he would get into the ship and fly off. I would also create the props for the animation and maybe put the Pilot into the animation fighting someone else that would be part of the game.
I think I would create the ship so that it was more industrial and create dents and scratches on the side to make it look run down and fit in with the deserted environment. I would also add a ruined building to the environment.
3D Max Progress
Monday, 21 May 2012
Monday, 19 March 2012
Environment Modeling

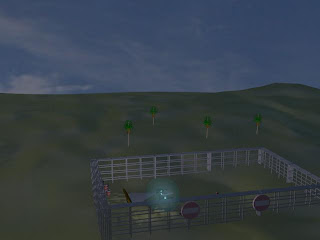
This is my environment so far, I have came up with the idea of a deserted airstrip in the desert. I thought it would be good to use it as a secret government location for aircraft to fly out into space to fight off aliens so that it stays secret and the government can take care of the extraterristials.
For the sand turned I turned into an editable patch so that I could raise and lower the levels to make sand dunes.
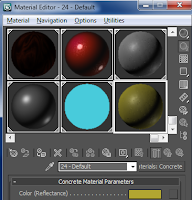
For the Material of the sand, I selected concrete and gave it an off-yellow colour with a black shading to go on to the dunes to give them shape to make them look 3D.
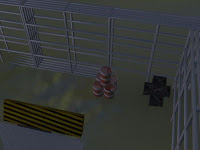
I added boxes and oil caninsters to give the airstrip more of a rundown look, I did this by giving the texture of the box a grunge texture which I created on photoshop and the canisters a red texture with rust marks that I created in 3DS max.
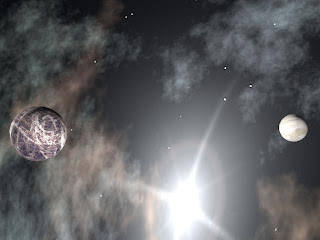
I decided to add a Space Dome to my environment so that my spacecraft could fly around planets, I used a texture from google images and edited it in photoshop to make it fit around the sphere properly and then applied it the texture to the model.
I also created to planets to make the Space Dome more realistic adding some lights to bright up the Space atmosphere.
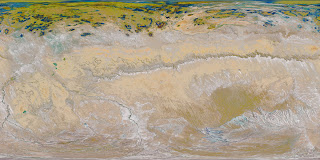
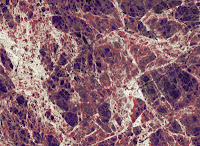
To create these planets I created a sphere model and then again took two rocky from google images and edited them to make them look different and then applied them to the models.
I included a broken down aeroplane into my scene to fill in the blank space in my environment, I created this using blueprints that I found on the internet. After the model was completed I added a red camouflage texture on to the plane to make it look military. As I made this plane last minute I was to fill in the blank space so it doesn't look too professional but it is definitely at a good standard.
Aircraft Progress
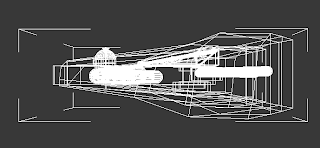
I am near to completion of my aircraft model. These are screenshots of the wireframe of the model.
I used the aircrafts from Star Wars for a reference, I gave my aircraft the industrial theme, this is when parts of the ship look like they have been taken from a junk yard in order to build the ship, you can see this from the four cylinders that connect the ship to the wings.
From the front and side you can see the droid that I added to the ship, I used as R2-D2 and other medical droids from the Star Wars series to incorporate into my design.
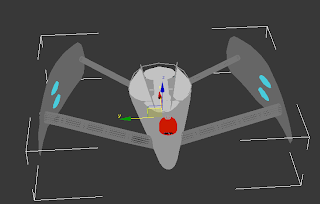 I added a meshsmooth to the model so that it looked more areodynamic, I also added a glow to the wings and to the back to add a neon vapour trail. I did this using the following tutorial.
http://www.youtube.com/watch?v=PWfZjVK-9xQ
This is the result of the tutorial to add a neon glow to my air craft.
This is my model on a Podium.
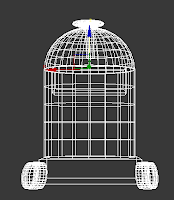
This is the wireframe for the medic droid that I made, I made the whole model before I put the droid on to the aircraft, this is so i can animate the model climbing on to the aircraft.
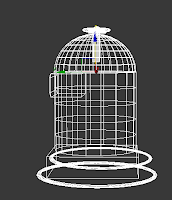
I used tracks to operate the movement of the model, I chose tracks from a conveyor belt as they wouldn't get stuck in the sand and it would be easier for the droid to move around.

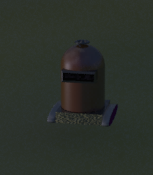 I took inspiration from R2-D2 for the size of the droid and Bender from futurama's eyes but replaced eyeballs with a heart rate monitor.
I used the aircrafts from Star Wars for a reference, I gave my aircraft the industrial theme, this is when parts of the ship look like they have been taken from a junk yard in order to build the ship, you can see this from the four cylinders that connect the ship to the wings.
From the front and side you can see the droid that I added to the ship, I used as R2-D2 and other medical droids from the Star Wars series to incorporate into my design.

 I added a meshsmooth to the model so that it looked more areodynamic, I also added a glow to the wings and to the back to add a neon vapour trail. I did this using the following tutorial.
http://www.youtube.com/watch?v=PWfZjVK-9xQ
This is the result of the tutorial to add a neon glow to my air craft.
This is my model on a Podium.

This is the wireframe for the medic droid that I made, I made the whole model before I put the droid on to the aircraft, this is so i can animate the model climbing on to the aircraft.

 I took inspiration from R2-D2 for the size of the droid and Bender from futurama's eyes but replaced eyeballs with a heart rate monitor.
I then used the texture map from R2-D2 that I found off the internet and edited in google to add to my Robot that I had created.
Monday, 5 March 2012
3D Model Planning.
Resources:
http://images.wikia.com/starfox/images/2/26/Arwingassault.jpg
https://blogger.googleusercontent.com/img/b/R29vZ2xl/AVvXsEgw-tFbI8e41SliihKDXX7stiRYRNuBfvhLU4hUQkTbRRSiUobwUArJah2QNk2TEgg4yfi2iA78JIU2TZ14lfls2j0yuZ6gzFAoexP3R8lE-3_xi16Of-14i82YkdeiQgpRPPsbqx4IXHKu/s1600/T-65+X-wing+starfighter.jpg
Autodesk 3ds Max
Concept art
http://www.3dvalley.com/tutorials/creating-realistic-glass-material-in-3ds-max/
^ Tutorial for glass material
Spacecraft Hangar ideas:
This is a mind map of my ideas, they consist of spacecraft from star wars and star treak and different textures including rust and rock for the ship.
I have also made a storyboard for shat I would like my space craft to do, I would like it to fly up from te ground into space and then back down to land where it started from.
Monday, 28 November 2011
3D Model for a Game
For this project the title we have come up with for the game is Intergalactic Warfare, this is because the genre of the game is Sci-fi and it is a spacecraft TPS.
The target audience for the game would be teens at the age of 16+, this is because there will explosions of the ships and it will include the use of unsuitable language, violence, blood and would not be suitable for the audiences younger than 16.
To make the model really well detailed I will have to make the model have a high polygon count so that it looks like it would fit well in a video game. When the model is finished I will save it as a .3ds file so that I am able to open it up and edit it, I will also save it is an .obj file so that I am able to open it up on to Unreal. I will make the image resolution 1080p so that every detail will be shown when rendering the model, this is because it will give it a nice finish and won’t leave out any detail of the model. Before I start modelling I will test out the different shapes on 3ds max until I find what shape is best to shape the ship with. I will then test what shape would be good for the docking station for where the turret is going to go which Shyam will be working on. I will look for images on Google to take inspiration from and then create my own on Photoshop, which I can then import to 3ds max and then place it on to the object, and then edit the width and height so that it fits perfectly on to the ship. I will be making textures for the gun dock, the ship itself and the trim around the ship; because I will need windows I will be able to create a glass texture as I have been reading tutorials on how to do this. I will need to add light so that it brightens up my model, I will also need to add lights coming out of the model to make it look like it has an engine that produces a repulsion system. I will make light shine on to the model so that it gives the effect of the moon or sun reflecting the rays on to the model.
As far as copyright is concerned I will try to make my own textures using inspiration from Google images as not everything can be just copied and then pasted on to 3ds max, however if this is the case I will try and get permission from the creator of that image. As we are working in pairs, everything we plan will be kept between us but the outcome will be different as we are both making two separate models that will then attach to each other. With it being a spacecraft it won’t offend any race gender or religion as it is just a model of a spacecraft and the only people that will see it is the person I’m with and maybe people around me as I’m working.
Monday, 14 November 2011
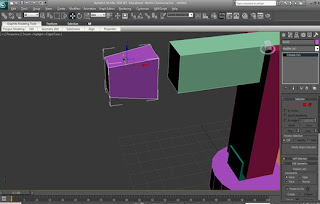
The Basics for Making a Robot Arm on 3DS Max
As part of my project to create models, buildings and other objects for a game. I was asked to use a tutorial of a robotic arm/claw to help me learn the basics on 3ds Max.
The first shape I made was a cylinder for the base of the model. I clicked on the create tool and then clicked on cylinder, I made it wide but not to high. I then clicked on the box tool and dragged it into the cylinder shape to make the back piece of the model.
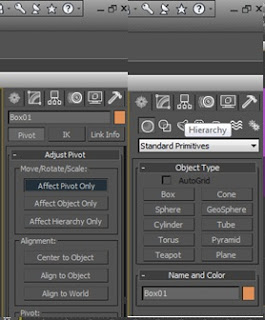
I then highlighted the new object and went to hierarchy, (the box with the smaller boxes linking off) affected pivot only and centred to object.
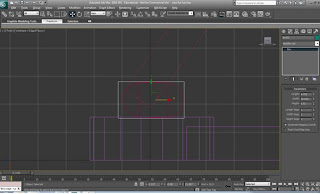
I chose the top two vertices with the bottom too and and pulled the two sides apart to create a rounded box.
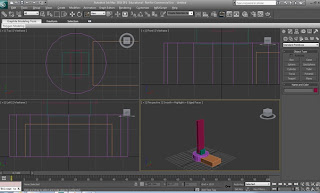
Using another box, I made two arms that while hold the top of the claw in the air, I made this by creating a new box inside the new shape.
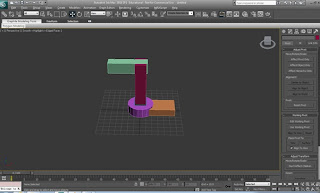
I again added another box to create the top of the model using the same box tool.
Using the vertex tool, select the vertices of of the four corners and shorten the face so that it looks something like this.
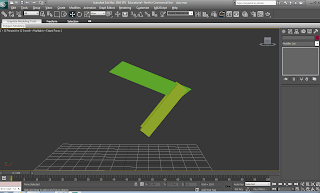
Using the affect pivot tool, select the first box and drag the arrow to the bottom of the box and rotate it about 70 degrees and then do the same with the box above it and rotate it about 45 degrees so that you have a hinge effect.
Select the base and again select the vertex tool on select the two corners and drag them inwards to create corners, deselect them and then select the two nearest the ones you just selected and the others on the opposite side and push them in so that you get a rounded effect on the corner.
Select the face of the box you just rounded and press shift and drag out the new box, shrink the box so you get a smaller one, and place it on top of the box you cloned it from.
Create two small cylinders and place them on them on the outside of the base and one on top of the new shape you just made.
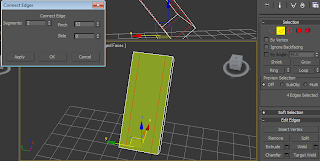
On the middle box, hightlight the top line with the edge tool and ring it so it connects with the bottom, create two segments by clicking the arrow near the connect button and spread them apart near the two edges but not too close and click ok. Select the face and press delete so that you are left with two cuboids. Using the border tool cap the part thats empty.
On the claw head, create a cylinder and split it in half like you did for the base that connects to the middle hinge, rotate it 90 degrees and put on either side of the head create a small box and extrude it out and then add another thin one stick out of the one you just created, when done mirror them and connect them to the half cylinders you just made , click the shape of the head and chamfer the the top so it smoothens it and you'll have yourself a claw head.
Create another cylinder and a thin long box to connect to the box next to it so it looks like it could move up and down.
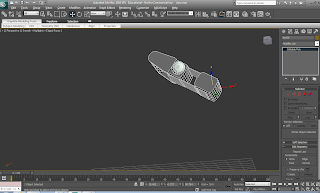
With the box that connects to the head, Create a box inside of it and then clone it, rounden the edges so it looks smooth, and from one of the faces of either cube, select the select faces icon and click on one of the faces and pull it out, click the edge button and ring it, create two segments, click the middle face and drag it down, pull the two on the edges apart to make a bridge looking shape, delete the cuboid thats covering the two mini cubes and put the bridge looking shape on top of the two cubes clone the bridge shape and rotate it 180 degrees so you can put another at the bottom.
The first shape I made was a cylinder for the base of the model. I clicked on the create tool and then clicked on cylinder, I made it wide but not to high. I then clicked on the box tool and dragged it into the cylinder shape to make the back piece of the model.
I then created a box to connect them together to make a base for the model.

I then highlighted the new object and went to hierarchy, (the box with the smaller boxes linking off) affected pivot only and centred to object.
Using the methods before, I created another box on top of the base. I scaled it to the size I wanted it, I then went into wire frame mode and create a cylinder inside the box.

I chose the top two vertices with the bottom too and and pulled the two sides apart to create a rounded box.

Using another box, I made two arms that while hold the top of the claw in the air, I made this by creating a new box inside the new shape.

I again added another box to create the top of the model using the same box tool.
Using the vertex tool, select the vertices of of the four corners and shorten the face so that it looks something like this.

Using the affect pivot tool, select the first box and drag the arrow to the bottom of the box and rotate it about 70 degrees and then do the same with the box above it and rotate it about 45 degrees so that you have a hinge effect.
Select the face of the box you just rounded and press shift and drag out the new box, shrink the box so you get a smaller one, and place it on top of the box you cloned it from.
Create two small cylinders and place them on them on the outside of the base and one on top of the new shape you just made.

On the middle box, hightlight the top line with the edge tool and ring it so it connects with the bottom, create two segments by clicking the arrow near the connect button and spread them apart near the two edges but not too close and click ok. Select the face and press delete so that you are left with two cuboids. Using the border tool cap the part thats empty.
On the claw head, create a cylinder and split it in half like you did for the base that connects to the middle hinge, rotate it 90 degrees and put on either side of the head create a small box and extrude it out and then add another thin one stick out of the one you just created, when done mirror them and connect them to the half cylinders you just made , click the shape of the head and chamfer the the top so it smoothens it and you'll have yourself a claw head.
Create another cylinder and a thin long box to connect to the box next to it so it looks like it could move up and down.

With the box that connects to the head, Create a box inside of it and then clone it, rounden the edges so it looks smooth, and from one of the faces of either cube, select the select faces icon and click on one of the faces and pull it out, click the edge button and ring it, create two segments, click the middle face and drag it down, pull the two on the edges apart to make a bridge looking shape, delete the cuboid thats covering the two mini cubes and put the bridge looking shape on top of the two cubes clone the bridge shape and rotate it 180 degrees so you can put another at the bottom.
Monday, 12 September 2011
To Make a Polygon
To make a polygon you start of with a point in 3D space and then create another point that conntects to the vertices to create a line/splice/vector, you then do this again to connect the vector to another point which then joins back up to the vertices to create the polygon.
Subscribe to:
Comments (Atom)


