Monday, 28 November 2011

3D Model for a Game

For this project the title we have come up with for the game is Intergalactic Warfare, this is because the genre of the game is Sci-fi and it is a spacecraft TPS.

The target audience for the game would be teens at the age of 16+, this is because there will explosions of the ships and it will include the use of unsuitable language, violence, blood and would not be suitable for the audiences younger than 16.

To make the model really well detailed I will have to make the model have a high polygon count so that it looks like it would fit well in a video game. When the model is finished I will save it as a .3ds file so that I am able to open it up and edit it, I will also save it is an .obj file so that I am able to open it up on to Unreal. I will make the image resolution 1080p so that every detail will be shown when rendering the model, this is because it will give it a nice finish and won’t leave out any detail of the model. Before I start modelling I will test out the different shapes on 3ds max until I find what shape is best to shape the ship with. I will then test what shape would be good for the docking station for where the turret is going to go which Shyam will be working on. I will look for images on Google to take inspiration from and then create my own on Photoshop, which I can then import to 3ds max and then place it on to the object, and then edit the width and height so that it fits perfectly on to the ship. I will be making textures for the gun dock, the ship itself and the trim around the ship; because I will need windows I will be able to create a glass texture as I have been reading tutorials on how to do this. I will need to add light so that it brightens up my model, I will also need to add lights coming out of the model to make it look like it has an engine that produces a repulsion system. I will make light shine on to the model so that it gives the effect of the moon or sun reflecting the rays on to the model.   

As far as copyright is concerned I will try to make my own textures using inspiration from Google images as not everything can be just copied and then pasted on to 3ds max, however if this is the case I will try and get permission from the creator of that image. As we are working in pairs, everything we plan will be kept between us but the outcome will be different as we are both making two separate models that will then attach to each other. With it being a spacecraft it won’t offend any race gender or religion as it is just a model of a spacecraft and the only people that will see it is the person I’m with and maybe people around me as I’m working.

Monday, 14 November 2011

The Basics for Making a Robot Arm on 3DS Max

As part of my project to create models, buildings and other objects for a game. I was asked to use a tutorial of a robotic arm/claw to help me learn the basics on 3ds Max.

The first shape I made was a cylinder for the base of the model. I clicked on the create tool and then clicked on cylinder, I made it wide but not to high. I then clicked on the box tool and dragged it into the cylinder shape to make the back piece of the model.


I then created a box to connect them together to make a base for the model.


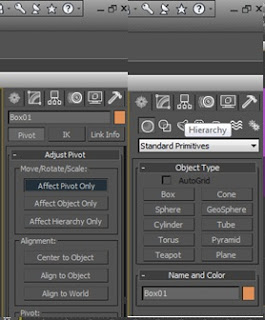
I then highlighted the new object and went to hierarchy, (the box with the smaller boxes linking off) affected pivot only and centred to object.


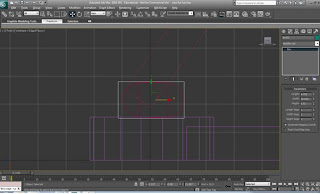
Using the methods before, I created another box on top of the base. I scaled it to the size I wanted it, I then went into wire frame mode and create a cylinder inside the box. 


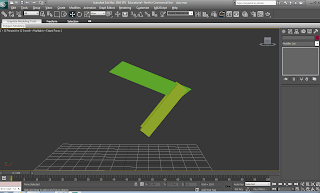
I chose the top two vertices with the bottom too and and pulled the two sides apart to create a rounded box.


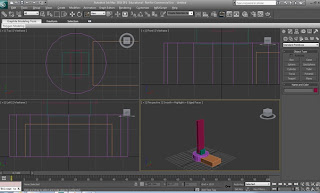
Using another box, I made two arms that while hold the top of the claw in the air, I made this by creating a new box inside the new shape.


I again added another box to create the top of the model using the same box tool.


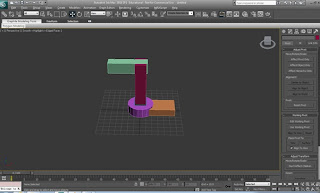
Create a final block to make the head of the claw to finalise the rough outline of the model.


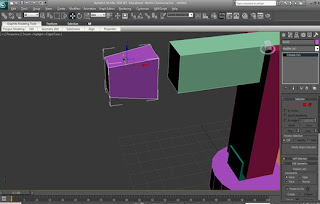
Using the vertex tool, select the vertices of of the four corners and shorten the face so that it looks something like this.


Using the affect pivot tool, select the first box and drag the arrow to the bottom of the box and rotate it about 70 degrees and then do the same with the box above it and rotate it about 45 degrees so that you have a hinge effect.


Select the base and again select the vertex tool on select the two corners and drag them inwards to create corners, deselect them and then select the two nearest the ones you just selected and the others on the opposite side and push them in so that you get a rounded effect on the corner.

Select the face of the box you just rounded and press shift and drag out the new box, shrink the box so you get a smaller one, and place it on top of the box you cloned it from.

Create two small cylinders and place them on them on the outside of the base and one on top of the new shape you just made.


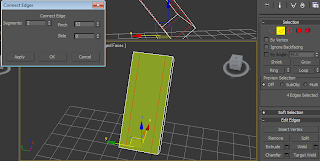
On the middle box, hightlight the top line with the edge tool and ring it so it connects with the bottom, create two segments by clicking the arrow near the connect button and spread them apart near the two edges but not too close and click ok. Select the face and press delete so that you are left with two cuboids. Using the border tool cap the part thats empty.


On the claw head, create a cylinder and split it in half like you did for the base that connects to the middle hinge, rotate it 90 degrees and put on either side of the head create a small box and extrude it out and then add another thin one stick out of the one you just created, when done mirror them and connect them to the half cylinders you just made , click the shape of the head and chamfer the the top so it smoothens it and you'll have yourself a claw head.

Create another cylinder and a thin long box to connect to the box next to it so it looks like it could move up and down.


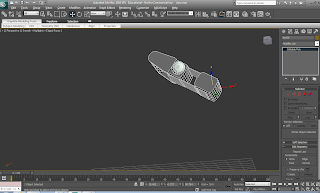
With the box that connects to the head, Create a box inside of it and then clone it, rounden the edges so it looks smooth, and from one of the faces of either cube, select the select faces icon and click on one of the faces and pull it out, click the edge button and ring it, create two segments, click the middle face and drag it down, pull the two on the edges apart to make a bridge looking shape, delete the cuboid thats covering the two mini cubes and put the bridge looking shape on top of the two cubes clone the bridge shape and  rotate it 180 degrees so you can put another at the bottom.


Monday, 12 September 2011

To Make a Polygon

To make a polygon you start of with a point in 3D space and then create another point that conntects to the vertices to create a line/splice/vector, you then do this again to connect the vector to another point which then joins back up to the vertices to create the polygon.